
 Contents
| Line 219: | Line 219: | ||
<p><b>Timing :</b>Once a Day (0 0 * * *)</p> | <p><b>Timing :</b>Once a Day (0 0 * * *)</p> | ||
<p><b>Path :</b> <span class="small-text">php -q /home/[USERNAME]/public_html/app/Console/cake.php soload -app /home/[USERNAME]/public_html/app</span></p> | <p><b>Path :</b> <span class="small-text">php -q /home/[USERNAME]/public_html/app/Console/cake.php soload -app /home/[USERNAME]/public_html/app</span></p> | ||
| + | </div> | ||
| + | <div class="docs"> | ||
| + | <ul><li>Jackpotwinner (Recommended) </li></ul> | ||
| + | <p>This cronjob is set in order to find and announce winners of Jackpot.</p> | ||
| + | <p><b>Timing :</b>Once a Day (0 0 * * *)</p> | ||
| + | <p><b>Path :</b> <span class="small-text">php -q /home/[USERNAME]/public_html/app/Console/cake.php jackpotwinner -app /home/[USERNAME]/public_html/app</span></p> | ||
</div> | </div> | ||
<div class="important"> | <div class="important"> | ||
Latest revision as of 10:02, 3 June 2016
- Download ProXCore script from your ProXScripts account from the following path :
- Login your ProXScripts account https://www.proxscripts.com/index.php?action=login
- Click on the "Downloads" link in the menu
- You will be able to see the products available for download. Click on "More..."
- You can see the script version and click on "Download Now" to download your Script.
- Unzip downloaded and upload all files present in the folder named "upload " :
- FTP to your webhost account. Upload all the files to public_html directory.
Note :Please note that if you are using subdomain, you must Upload all the files to corresponding public_html/subdomain directory .
- Create Database
- During script installation, you will come across "Database Configuration". Enter your Host Name, Database Name, Username, Password and your database will be created. When you install the script, you will be prompted with
- Run install/index.php File
- [YOUR SITE URL]/install/index.php
- Insert details
- Insert the necessary details and follow the setup. Refer to the screenshots for the same.
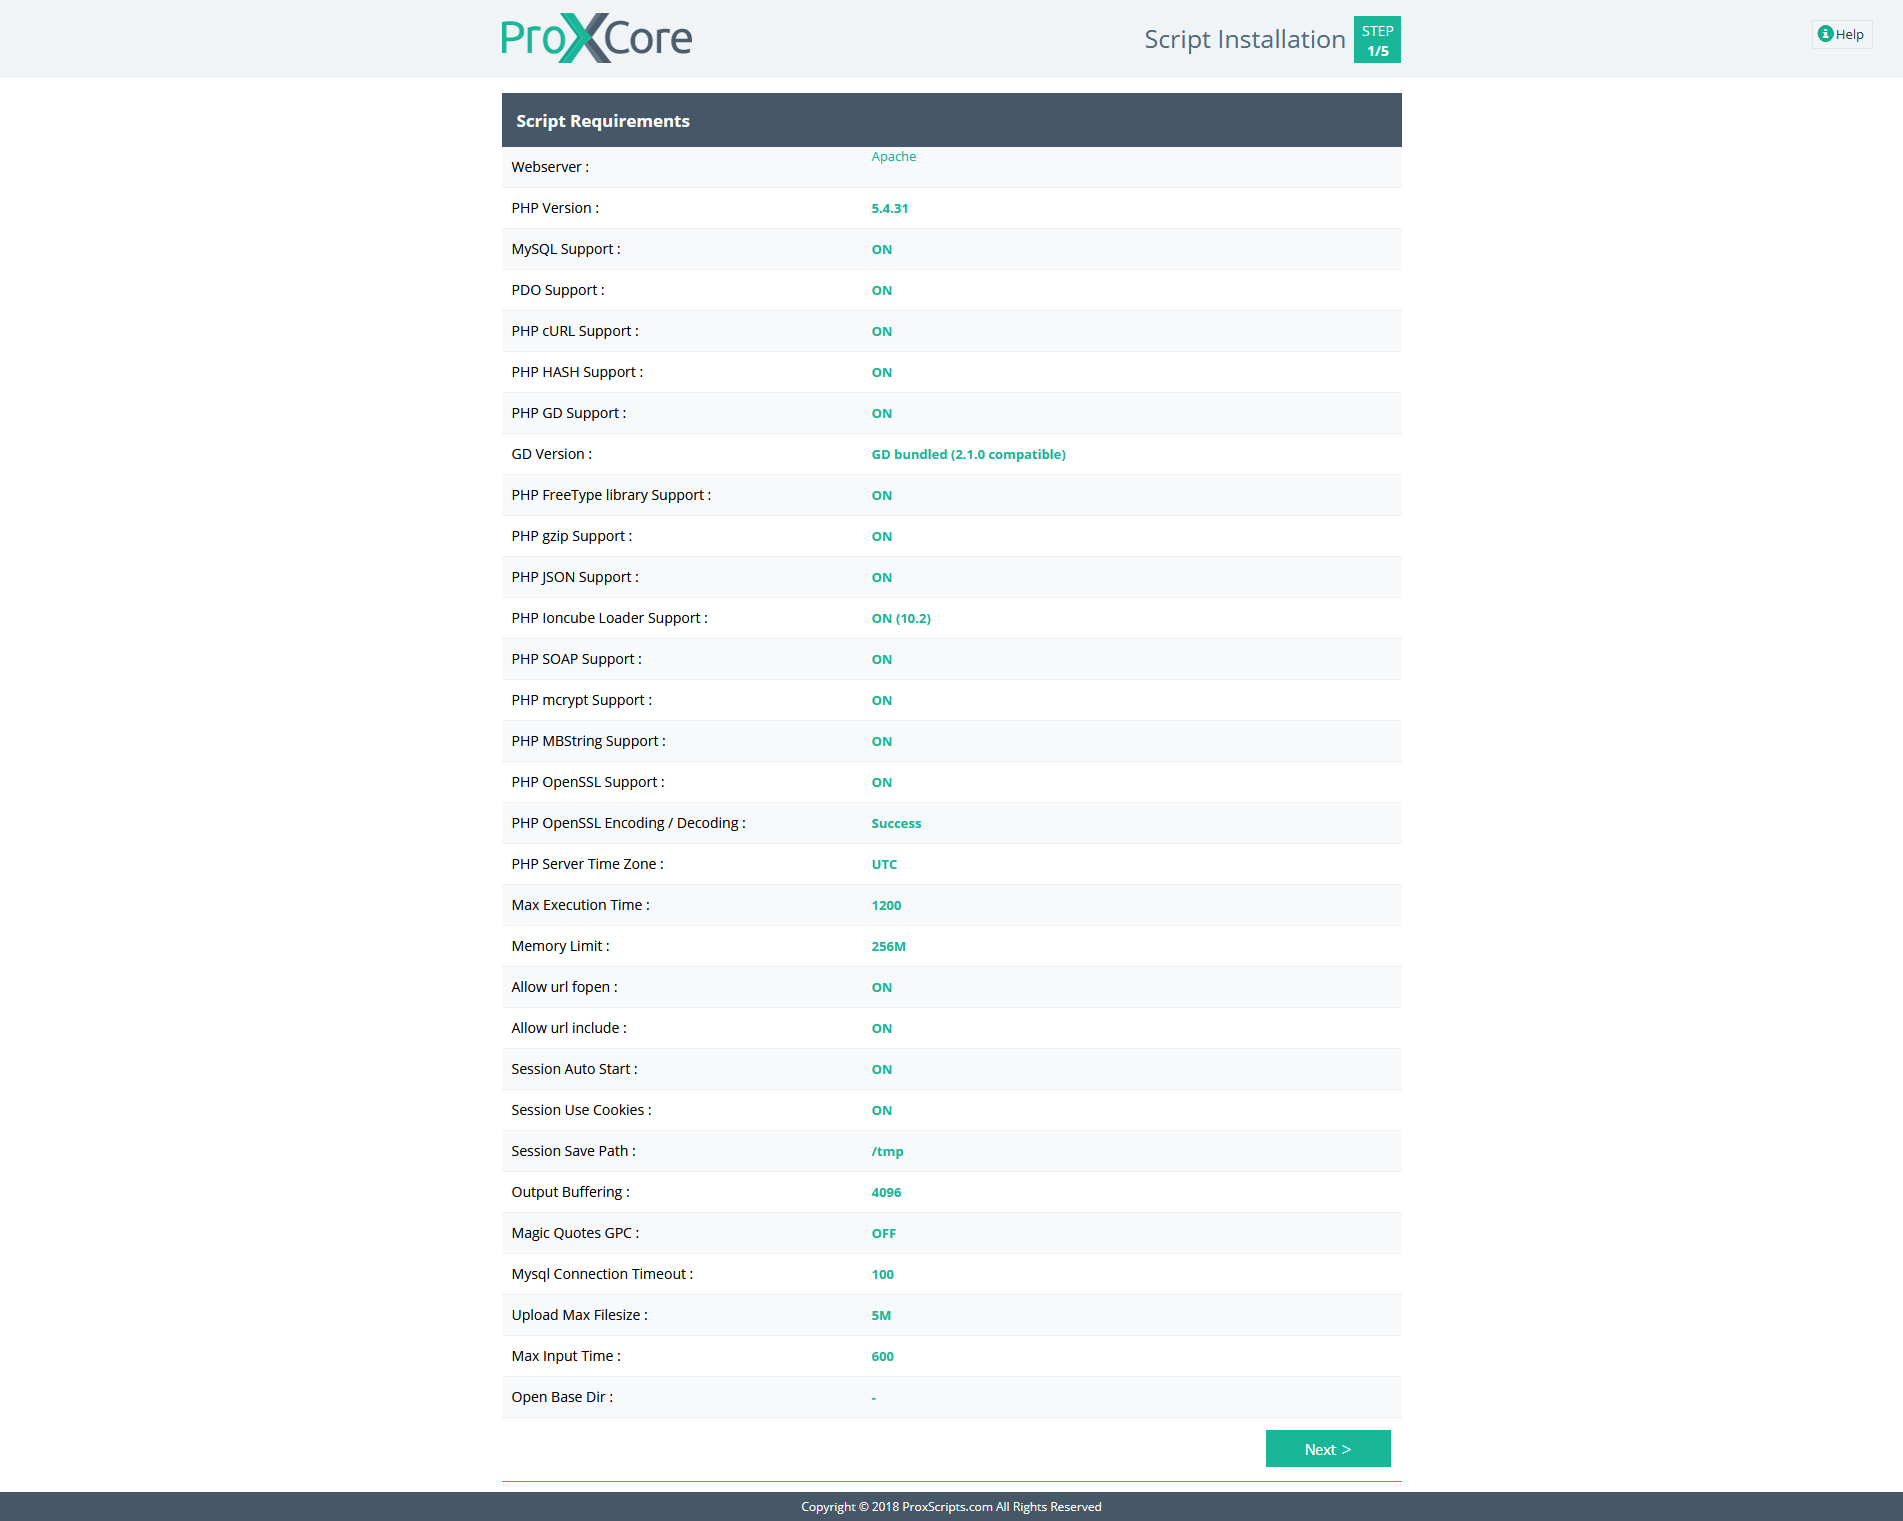
- Step 1 – Script Requirements – This will display the script requirements. If there is anything missing, then make sure the requirements are fulfilled first before you proceed to the next step.
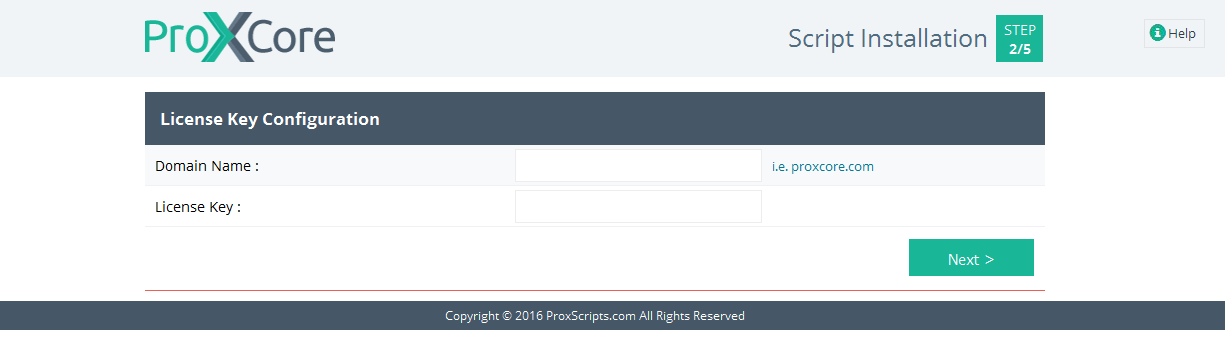
- Step 2 – License Key Configuration
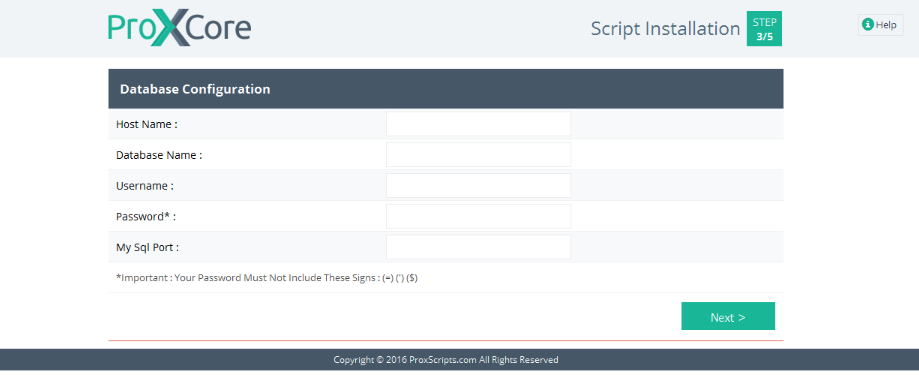
Please enter your Domain Name and License Key here. - Step 3 – Database Configuration
You need to add the data base details/credentials that have been created in the initial stage i.e. Create Database here.
- Host Name: If you are not using the database remotely, then generally it can be localhost
- Database Name: Enter the name of your database here.
- Username: Enter the name of your database username here.
- Password*: Enter the password here. Please note that this is a mandatory field.
- My Sql Port: If there is a particular/special port being used, then you can add that here, otherwise keep it empty.
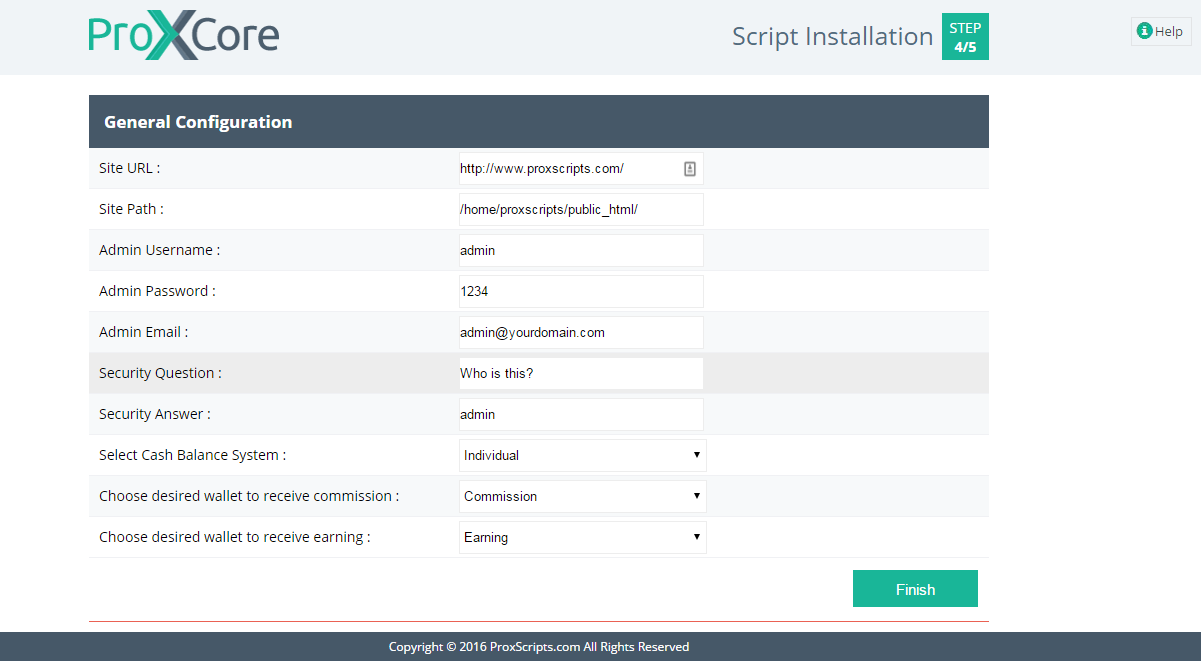
- Step 4 – General Configuration
- Site URL: By default it will automatically be added
- Site Path: By default it will automatically be added
- Admin Username: Enter your username here.
- Admin Password*: Enter your password here.
- Security Question: Please set a security question here. In case, you lose your password, then you can recover it through the Security Question and Security Answer.
- Security Answer: Enter the answer to the security question above.
- Select Cash Balance System: There are 2 types of balance systems available:
Individual : If you want to use separate cash wallet for payment processors then select Individual balance system.
For instance, PayPal Cash, PayPal repurchase, PayPal Commission, PayPal Earning, Payza Cash and so on.
Common : If you want to use common cash wallet for all payment processors, then select Common balance system. Here, there will be single cash/repurchase/commission/earning wallet for all payment processors.
For instance single wallet for Cash, single wallet for Repurchase, Commission and Earning and so on. There will no specific processor based balance.
- Choose desired wallet to receive commission: There are 2 options for this:
Cash :If you want to receive commission in cash wallet then select Cash wallet.
Commission :If you want to receive commission in commission wallet then select Commission wallet.
Please refer Note section for More. - Choose desired wallet to receive earning: There are 2 options for this:
Cash :If you want to receive earning in cash wallet then select Cash wallet.
Earning :If you want to receive earning in earning wallet then select Earning wallet.
Please refer Note section for More.
- Choose desired wallet to receive commission
- Choose desired wallet to receive earning
- Step 5 – Installation Complete
- Now your script installation is complete
Important Note :
Cash : If you want 2 wallet system i.e. Cash and Re-purchase and NOT Earning and Commission, then choose Cash here.
Commission : If you want 4 wallet system i.e. Cash, Re-purchase, Earning, Commission, then choose Commission here.
Cash : If you want 2 wallet system i.e. Cash and Re-purchase and NOT Earning and Commission, then choose Cash here.
Earning : If you want 4 wallet system i.e. Cash, Re-purchase, Earning, Commission, then choose Earning here.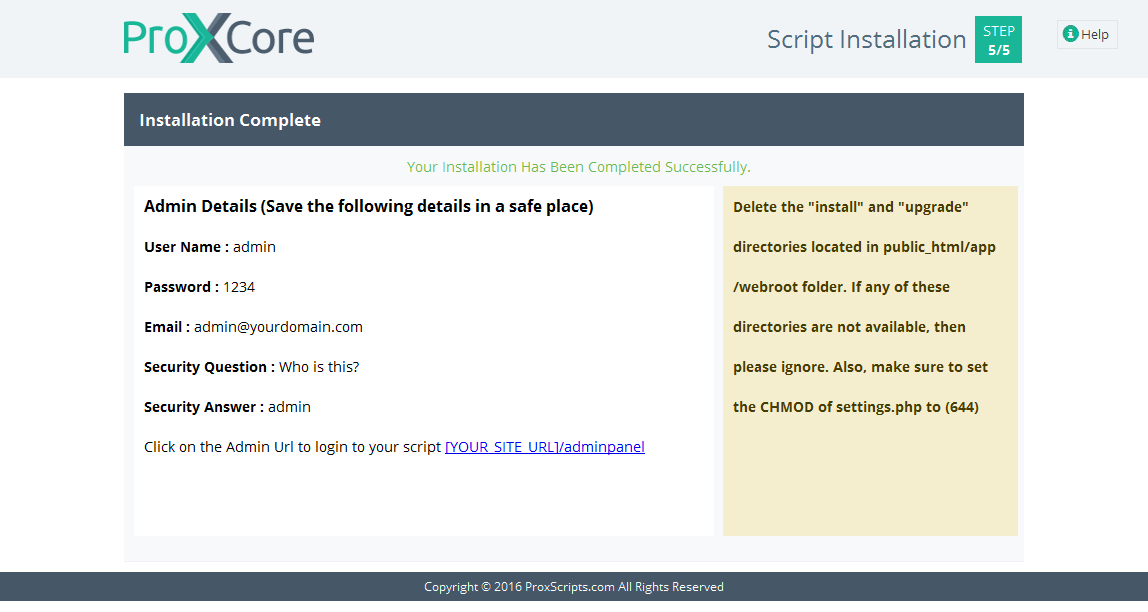
- Insert the necessary details and follow the setup. Refer to the screenshots for the same.
- Your site is ready
- Once the installation is complete, you can visit your site:
- Admin Area - [YOUR SITE URL]/adminpanel/
- Public/Member Area - [YOUR SITE URL]
- Once the installation is complete, you can visit your site:
- Important
- Delete the Install directory located in public_html/app/webroot/install directory and set the CHMOD of settings.php back to (644).
- Next step is to setup your cronjob as below.
Note : Your Password Must Not Include These Signs: (=) (') ($)
- A) Login to your cPanel
- B) Go to "Advanced" option and select cron jobs
- C) Enter your email address in the cron email option.
If you want to receive email notifications whenever cronjobs run, then enter your email here, otherwise leave it blank. So, if you enter your email here, then you will get an email notification every time your cronjob runs.
Important Note :
- Cronjobs run from the server according to the time specified for them.The cronjobs will run at the server time.
- D) Set the following cronjobs as per your requirements after replacing your cPanel username with [USERNAME] with the following list one by one. (Exclude Angle brackets with USERNAME too.)
- Autoresponder (Optional)
Sends the autoresponder mails to the members of the site as per admin's settings. It is Useful for follow-ups. Set this cronjob if you plan to use Auto responders in your site.
Timing : Once a Day (0 0 * * *)
Path : php -q /home/[USERNAME]/public_html/app/Console/cake.php autoresponder -app /home/[USERNAME]/public_html/app
- Autowithdraw (Optional)
Used to make payments towards member's withdrawal requests automatically through masspay as per admin's settings for each processor.
Timing : Once a Day (0 0 * * *) - Keep less time for quicker payments towards withdrawals
Path : php -q /home/[USERNAME]/public_html/app/Console/cake.php autowithdraw -app /home/[USERNAME]/public_html/app
- Backup (Optional)
Takes backups of the database as per the 'Auto Backup' settings from adminpanel.
Note : Please note that the file size exceeds 20 MB, then backup will not work.
Timing : Once a Day (0 0 * * *)
Path : php -q /home/[USERNAME]/public_html/app/Console/cake.php backup -app /home/[USERNAME]/public_html/app
- Common (Recommended)
Does miscellaneous jobs such as clearing old logs, providing signup bonus and notifying members via an email when the credits of their banner/text ads are used up.
Timing : Once a Day (0 0 * * *)
Path : php -q /home/[USERNAME]/public_html/app/Console/cake.php common -app /home/[USERNAME]/public_html/app
- Currency (Optional)
Fetches the currency rates from ProXScripts.com and updates the currency rates in the site. Set if you plan to use multiple currencies in your site.
Timing : Once a Day (0 0 * * *) - Keep less time for quicker currency updates
Path : php -q /home/[USERNAME]/public_html/app/Console/cake.php currency -app /home/[USERNAME]/public_html/app
Note : Currency cronjob fetches the latest currency rates from our site and updates them to your site. You can change the timing of the cronjob according to your requirements. Take a note that we update the rates on our site every 12 hours. So, do not keep the cronjob time less than that or there won't be any updates unless 12 hours are complete.
- Mails (Recommended)
Used to send email reminders to members who have not confirmed their email addresses or who have not logged in for many days i.e. inactive members and who have not purchased anything from the site i.e. unpaid members.
Timing : Once a Day (0 0 * * *)
Path : php -q /home/[USERNAME]/public_html/app/Console/cake.php mail -app /home/[USERNAME]/public_html/app
- Mass Mails (Optional)
This is for sending mails to members of your website.
If you are having a Dedicated Server or VPS, then you can set any number of emails you wish. If you are on a shared hosting plan, then you can set between 100-300 emails as per your hosting company rules.
Timing : Twice Per Hour (0,30 * * * *)
Path : php -q /home/[USERNAME]/public_html/app/Console/cake.php massmail [HOWMANYEMAIL] -app /home/[USERNAME]/public_html/app
USERNAME : You need to enter the cPanel username here.
HOWMANYEMAIL : You need to enter the figure of number of emails here WITHOUT the brackets, but it includes the space. If you set 100 here, then 100 emails will be sent when this cronjob runs.
For instance:
USERNAME is abc
HOWMANYEMAIL – 100
php -q /home/abc/public_html/app/Console/cake.php massmail 100 –app /home/abc/public_html/app
- Membership (Optional)
Sends membership payment reminder mails before the expiry date of the membership and automatically renews the memberships of the members who have allowed auto-renewals. Not needed if you do not plan to use memberships in your site.
Timing : Once a Day (0 0 * * *)
Path : php -q /home/[USERNAME]/public_html/app/Console/cake.php membership -app /home/[USERNAME]/public_html/app
- Soload (Optional)
Sends solo ads to members of the site who have not unsubscribed from solo ads. Not needed if you do not plan to use soloads feature in your site.
Timing :Once a Day (0 0 * * *)
Path : php -q /home/[USERNAME]/public_html/app/Console/cake.php soload -app /home/[USERNAME]/public_html/app
- Jackpotwinner (Recommended)
This cronjob is set in order to find and announce winners of Jackpot.
Timing :Once a Day (0 0 * * *)
Path : php -q /home/[USERNAME]/public_html/app/Console/cake.php jackpotwinner -app /home/[USERNAME]/public_html/app
Note :Please note that if you are using subdomain, you must put the corresponding folder name after public_html/ in the above lines.
For instance:
Domain is abc.com
SubDomain is xyz
i.e. xyz.abc.com
So, let's say for the "Autoresponder" cronjob the path would be as below:
php -q /home/[USERNAME]/public_html/xyz/app/Console/cake.php autoresponder -app /home/[USERNAME]/public_html/xyz/app
If you have purchased Branding Free Option, then you can disable branding by going through the following steps.
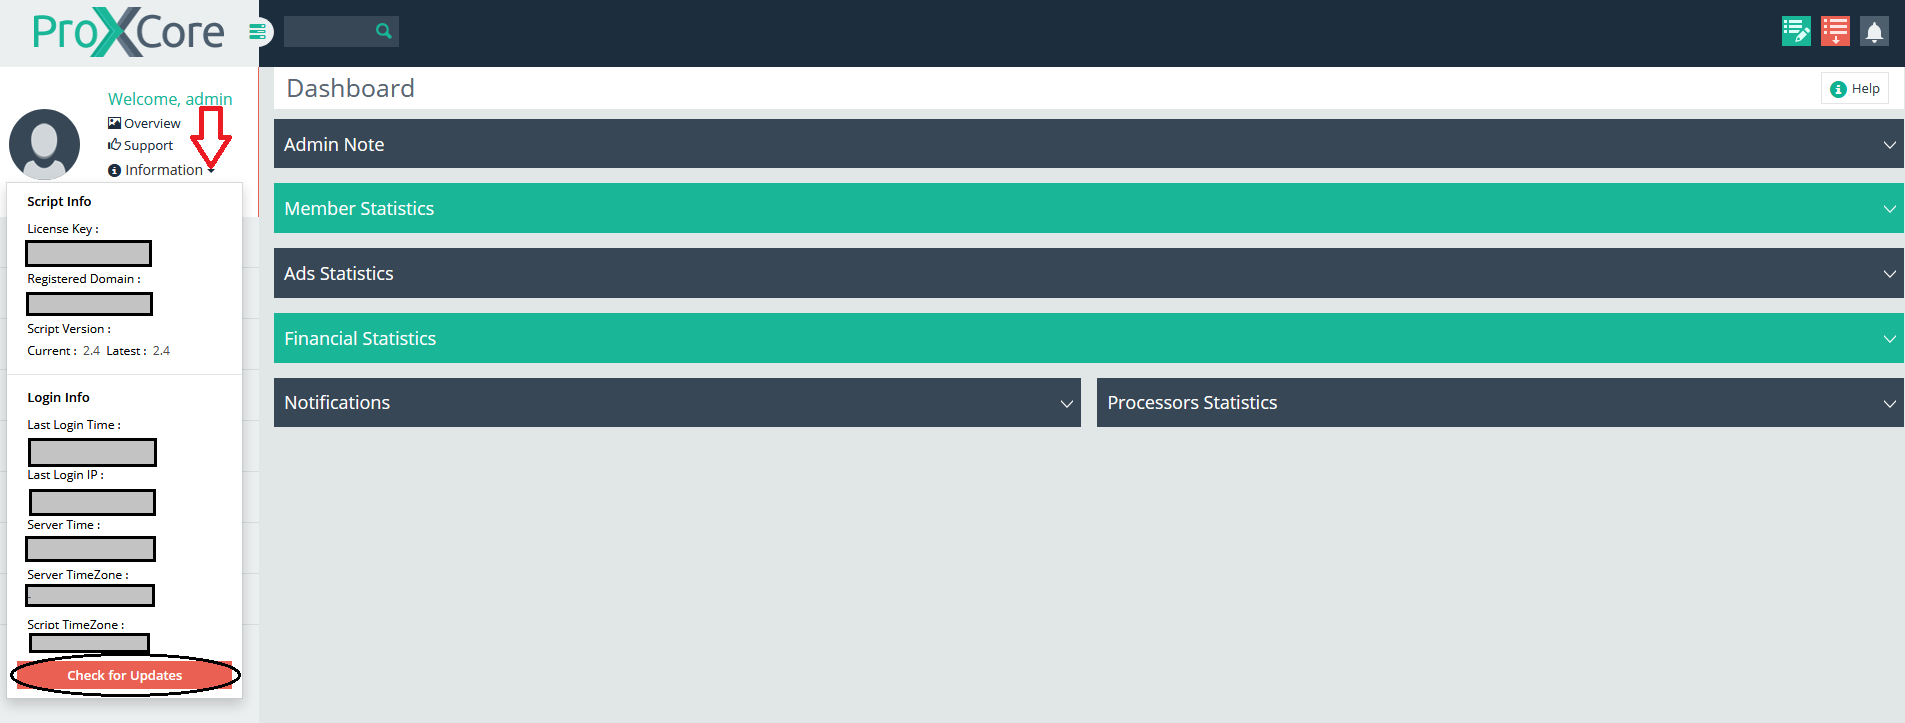
- Login to your admin area.
- Click on Information on the top left side.
- You will find a "Check for Updates" button. Click on it.
-
- Click on "Apply Updates" button.
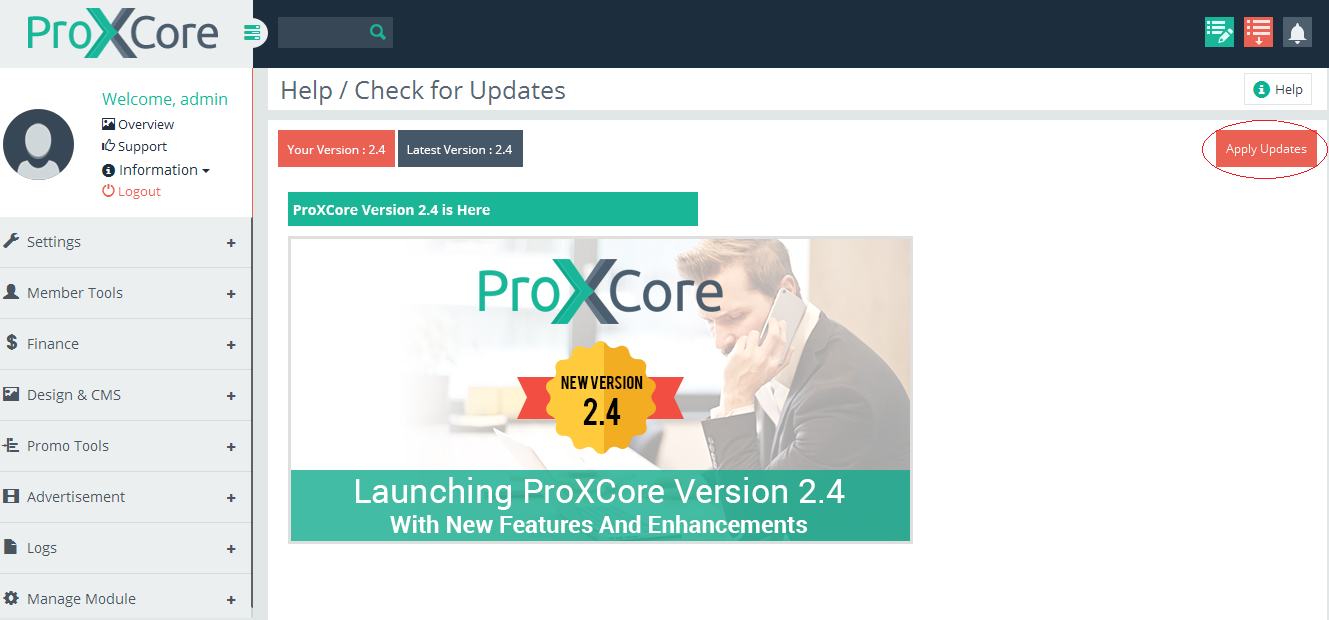
- Then refresh your homepage and the powered by link will not be seen.
If you have any queries/problems, please log in to your ProXScripts account and create a support ticket.