 Contents
From Proxscripts Documentation
| Line 40: | Line 40: | ||
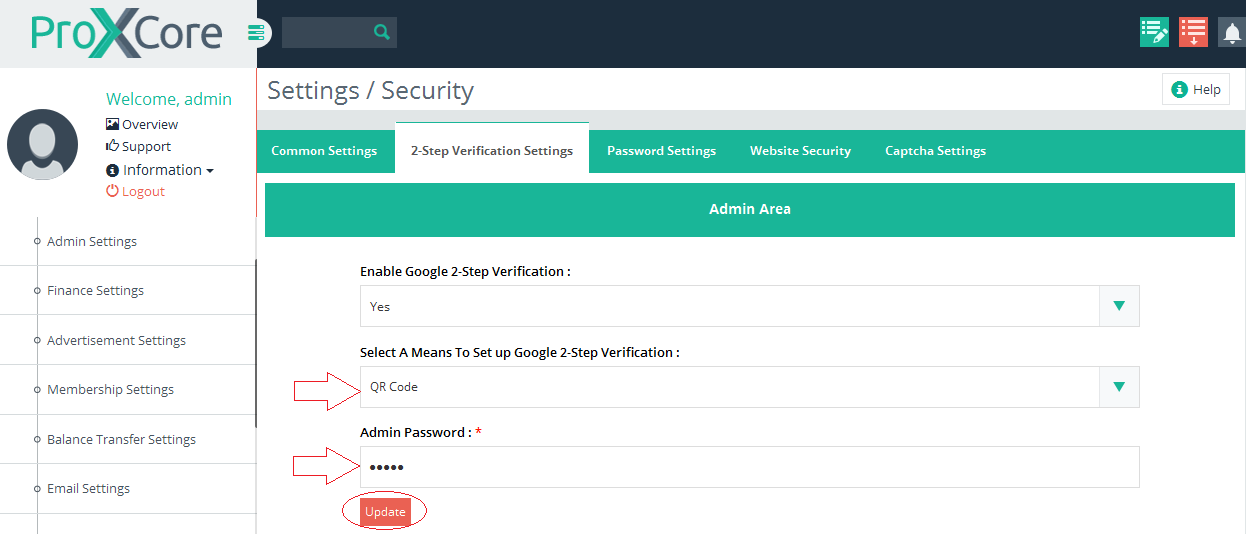
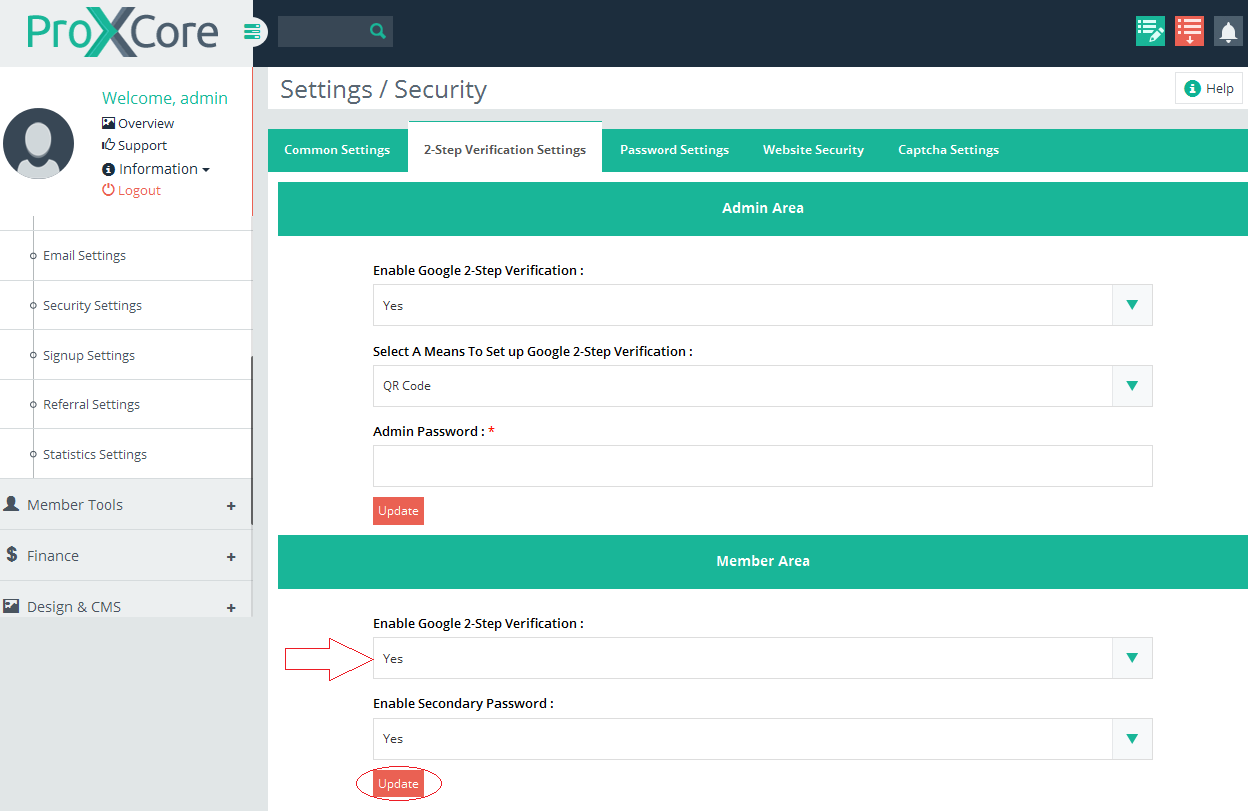
<li>Select Enable Google 2-Step Verification: <b> Yes</b></li> | <li>Select Enable Google 2-Step Verification: <b> Yes</b></li> | ||
<xa class='fancybox-effects-d' href='https://www.proxscripts.com/docs/images/passwordprotectauthenticator/step4.png' title=''><img src='https://www.proxscripts.com/docs/images/passwordprotectauthenticator/step4.png' alt='' style='padding:2px;margin:1px;'/></xa> | <xa class='fancybox-effects-d' href='https://www.proxscripts.com/docs/images/passwordprotectauthenticator/step4.png' title=''><img src='https://www.proxscripts.com/docs/images/passwordprotectauthenticator/step4.png' alt='' style='padding:2px;margin:1px;'/></xa> | ||
| − | <li>There are two ways to Google 2-Step Verification: <br/> | + | <li>There are two ways to Google 2-Step Verification: <br/><br/> |
| − | [[Security_Steps#QR Code| 1) QR Code]]<br/> | + | [[Security_Steps#QR Code| 1) QR Code]]<br/><br/> |
[[Security_Steps#Secret Key| 2) Secret Key]] | [[Security_Steps#Secret Key| 2) Secret Key]] | ||
</li> | </li> | ||
Revision as of 12:12, 7 April 2016
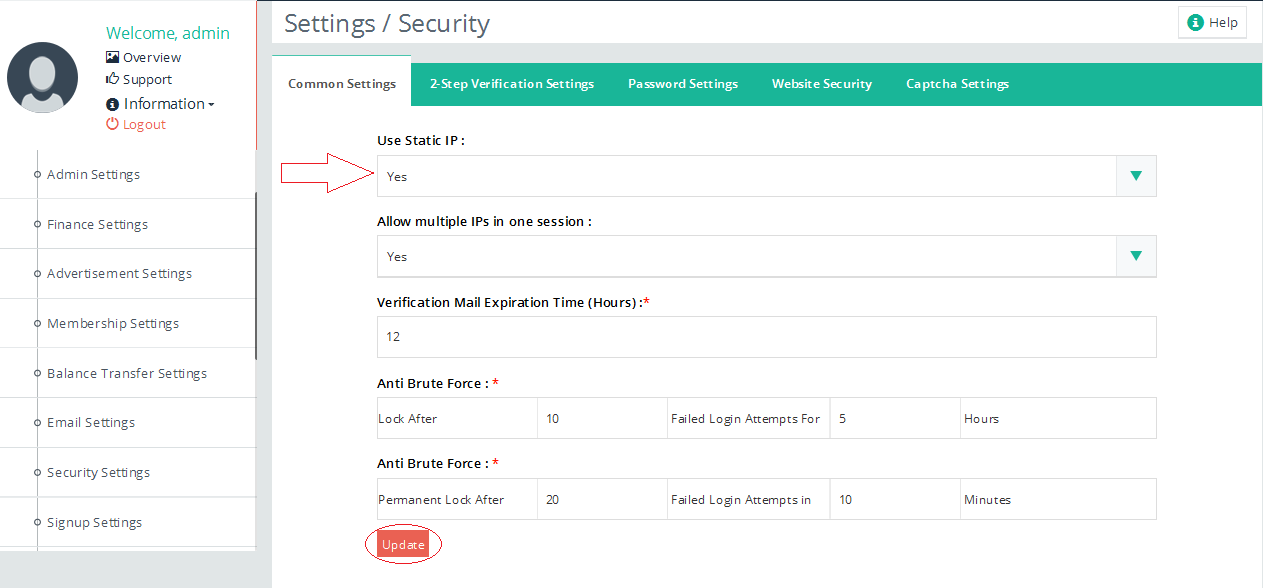
- If you are a single admin and using a Static IP, then it is better to enable Static IP option so
that no one else can login to your account apart from you.Kindly follow these steps for the same:
- Open AdminPanel
- Click On Settings
- Click On Security Settings


- Select Use Static IP :Yes
Static IP Settings

2-step Authentication
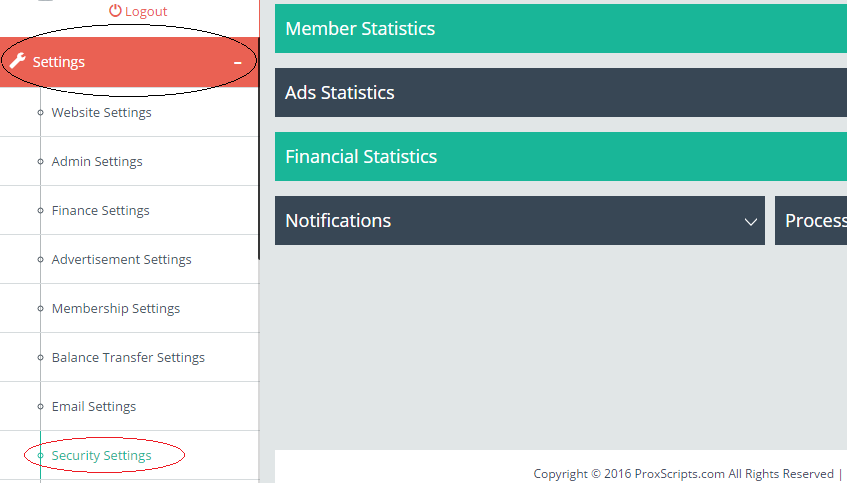
- Open Adminpanel
- Click On Settings
- Click On Security Settings


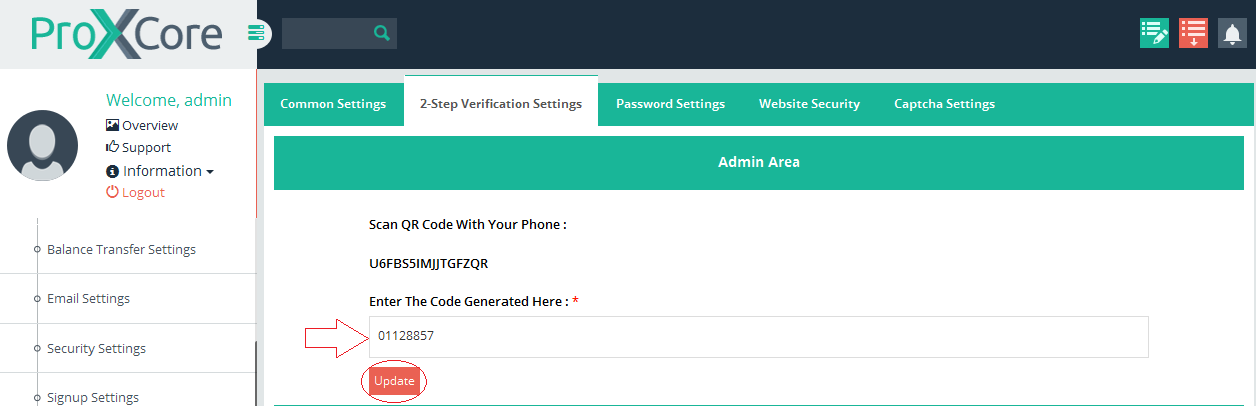
1) QR Code
2) Secret Key
Download Of Google Authenticator App Available for Android, iOS and Windows. Click on the below respective operating system to download the App.


- In the Application, click on the top Right hand side
- Click On Set Up Account
- Click A Scan a barcode
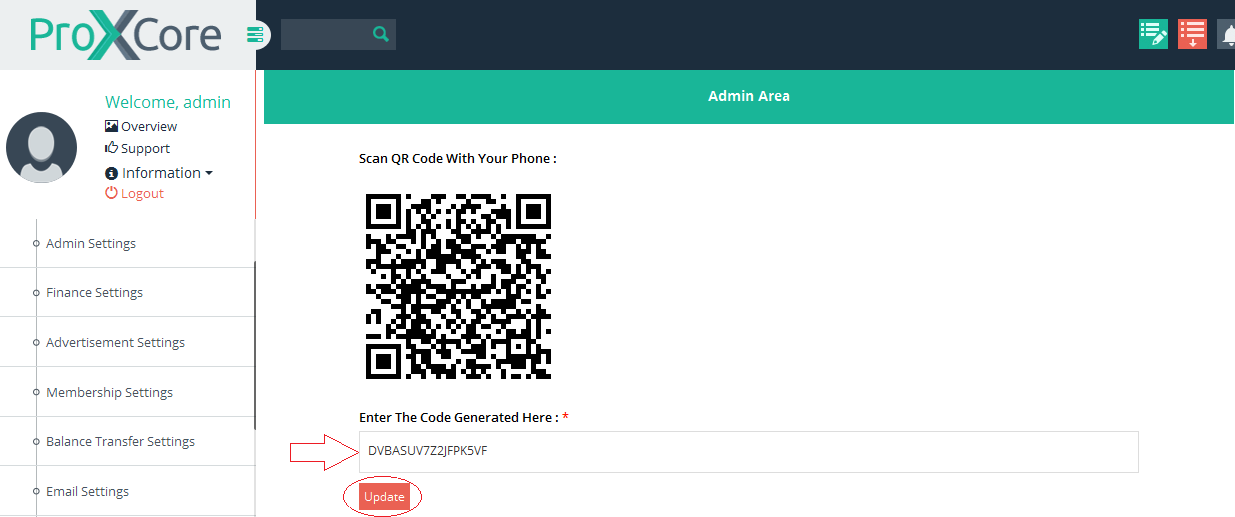
- Now, put your device in front of the Image and scan the image.


Download Of Google Authenticator App Available for Android, iOS and Windows. Click on the below respective operating system to download the App.
- In the Application, click on the top Right hand side
- Click On Set Up Account
- Click A Enter provided key
- You will need to enter the following information for Manual account entry
- Enter account name : Enter your account name here. Please note that this is an optional field. It is not a must/mandatory.
- Enter your key : You need to enter the key here that is generated after you click on Update.
- Time based : If you choose time based token, then the number will change on its own after every few seconds. You will need to enter the token before the timer ends.
- Counter based : If you choose counter based token, there is no restriction on the time on when to enter the code. You can refresh a button to change the code.


Password Protected Directory
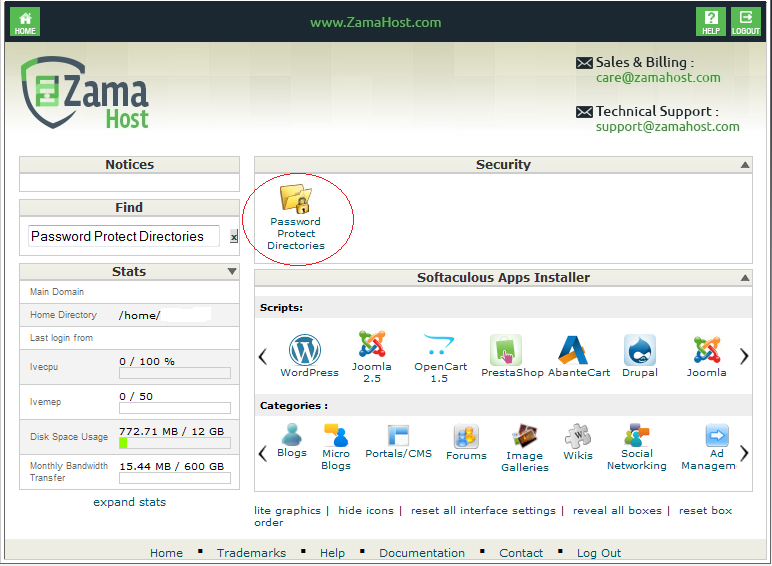
- Open cPanel
- Click on Password Protect Directories
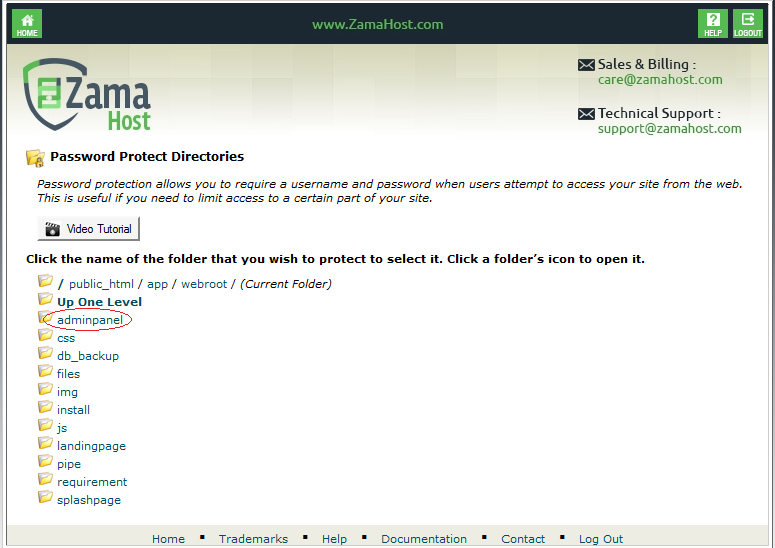
- Click the folder icon to select directory path admindirectory
Click on adminpanel directory name
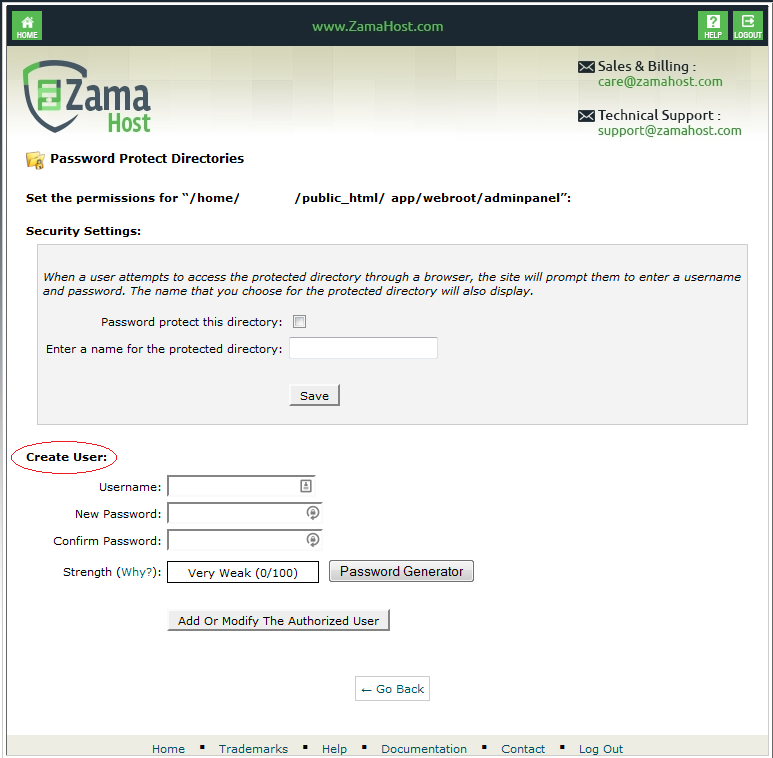
Path: public_html/app/webroot/adminpanel - Next Create User
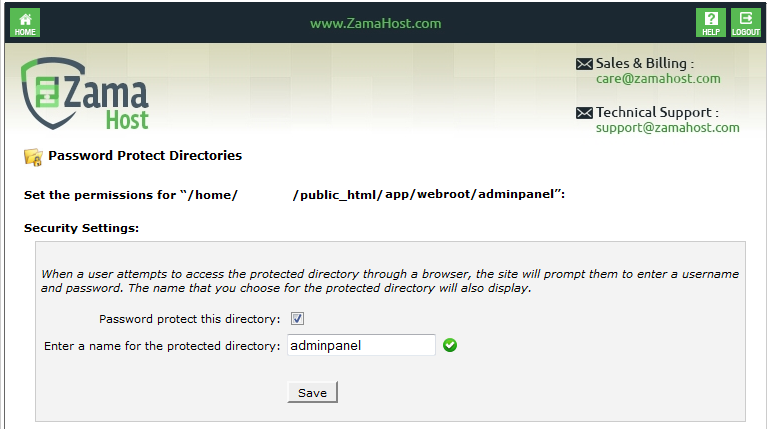
- Next check on checkbox next to “Password protect this directory” and enter "adminpanel" in the field “Enter a name for the protected directory”. Then click on Save button.
- You will see next page with"Permissions Updated"